Stream-Pi, the Better Stream Deck?
Need a cheap alternative to the Stream Deck? If you have a Raspberry Pi laying around you might be in luck!
If you've been around the Internet for the last couple of years, you might have heard of something called a Stream Deck. Essentially, this little piece of hardware is a control pad that can act as a programmable keyboard, allowing you to access numerous things with the touch of a button. If you've thought about owning one, then discovered the price and decided against it, well I'm here with an option: Stream-Pi.
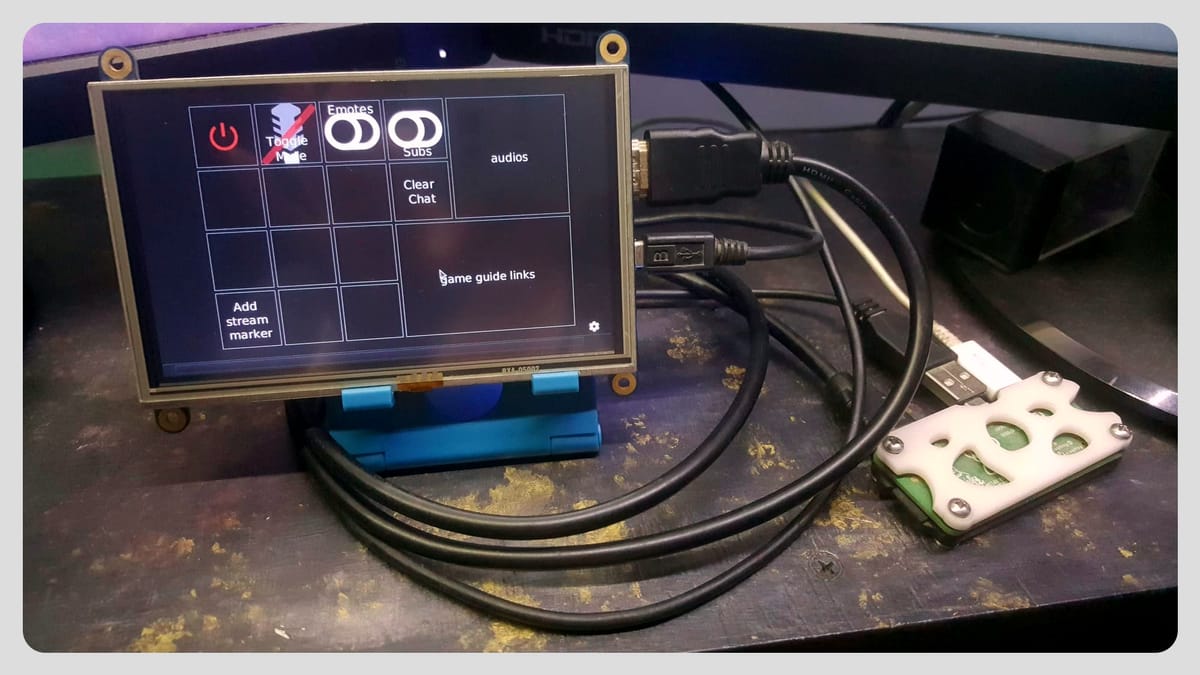
Stream-Pi was something I came across a few years ago when I started getting a little more serious about my stream. The Elgato Stream Deck was all the buzz and being someone who can't afford the Mexican Peso to USD exchange rate, I was looking for other options. Enter, the Stream-Pi. This little open source program is just short of amazing for anyone wanting to stream, let alone have something that you can control with the touch of a button. Best part: it runs on almost anything. For me, I run it on my little Raspberry Pi Zero W (RPZW) and a touch screen that I bought for another project. If you've got an old Android device laying around, it will probably run off that too (supports Android OS 5.0+ and it has to be 64-bit). These are what are called client options, while you can use your Windows desktop as the server. You need both to run Stream-Pi. I'll do a walk through for my set-up below. In order to get started, head to https://stream-pi.com/ and determine what you want to do.
Installation:
- Client Side
- Install Raspberry Pi OS 32-bit for the RPZW. Please note that this has be an OS with a visual desktop.
- You will need to connect to the RPZW via SSH (I use PuTTY for this) and then the RPZW to the Internet and install OS updates.
- Once you're done with that, copy and paste this (Basically we're just connecting to the Stream-Pi server and GitHub repo to install the client): curl -sSL https://install.stream-pi.com/client/raspberry-pi | bash -s – -d https://github.com/stream-pi/client/releases/download/2.0.0-SNAPSHOT/stream-pi-client-linux-arm32-2.0.0-SNAPSHOT-executable.zip
- Server Side
- Download and install the 2.0.0 SNAPSHOT.
- If you had issues with running this, make sure your runtime is updated and update if needed.
- I still had issues after this, so this is how I fixed it:
- In your Windows PC, uninstall Stream-Pi server from your control panel.
- Go to the following directory using file explorer: %HOMEPATH%\Stream-Pi\
- Delete the "Server" directory.
- Once you've done that, download via this link: https://github.com/stream-pi/server/releases/download/2.0.0-SNAPSHOT/stream-pi-server-windows-x64-2.0.0-SNAPSHOT-installer.msi
- Install this.
- Connecting
- Give it some time for the poor things to find each other and connect. It took me around 5 minutes for them to have that "aha" moment.
Setting things up can be a bit tricky for first time users. For me, I decided to update to the 2.0.0-SNAPSHOT Pre-release because I really wanted to play around with the different sizing options for buttons. In order to utilize Stream-Pi effectively, you absolutely need to play around with it; explore. When you go to press that little cog wheel in the bottom right corner of your client, you will need to enter in your connection credentials.
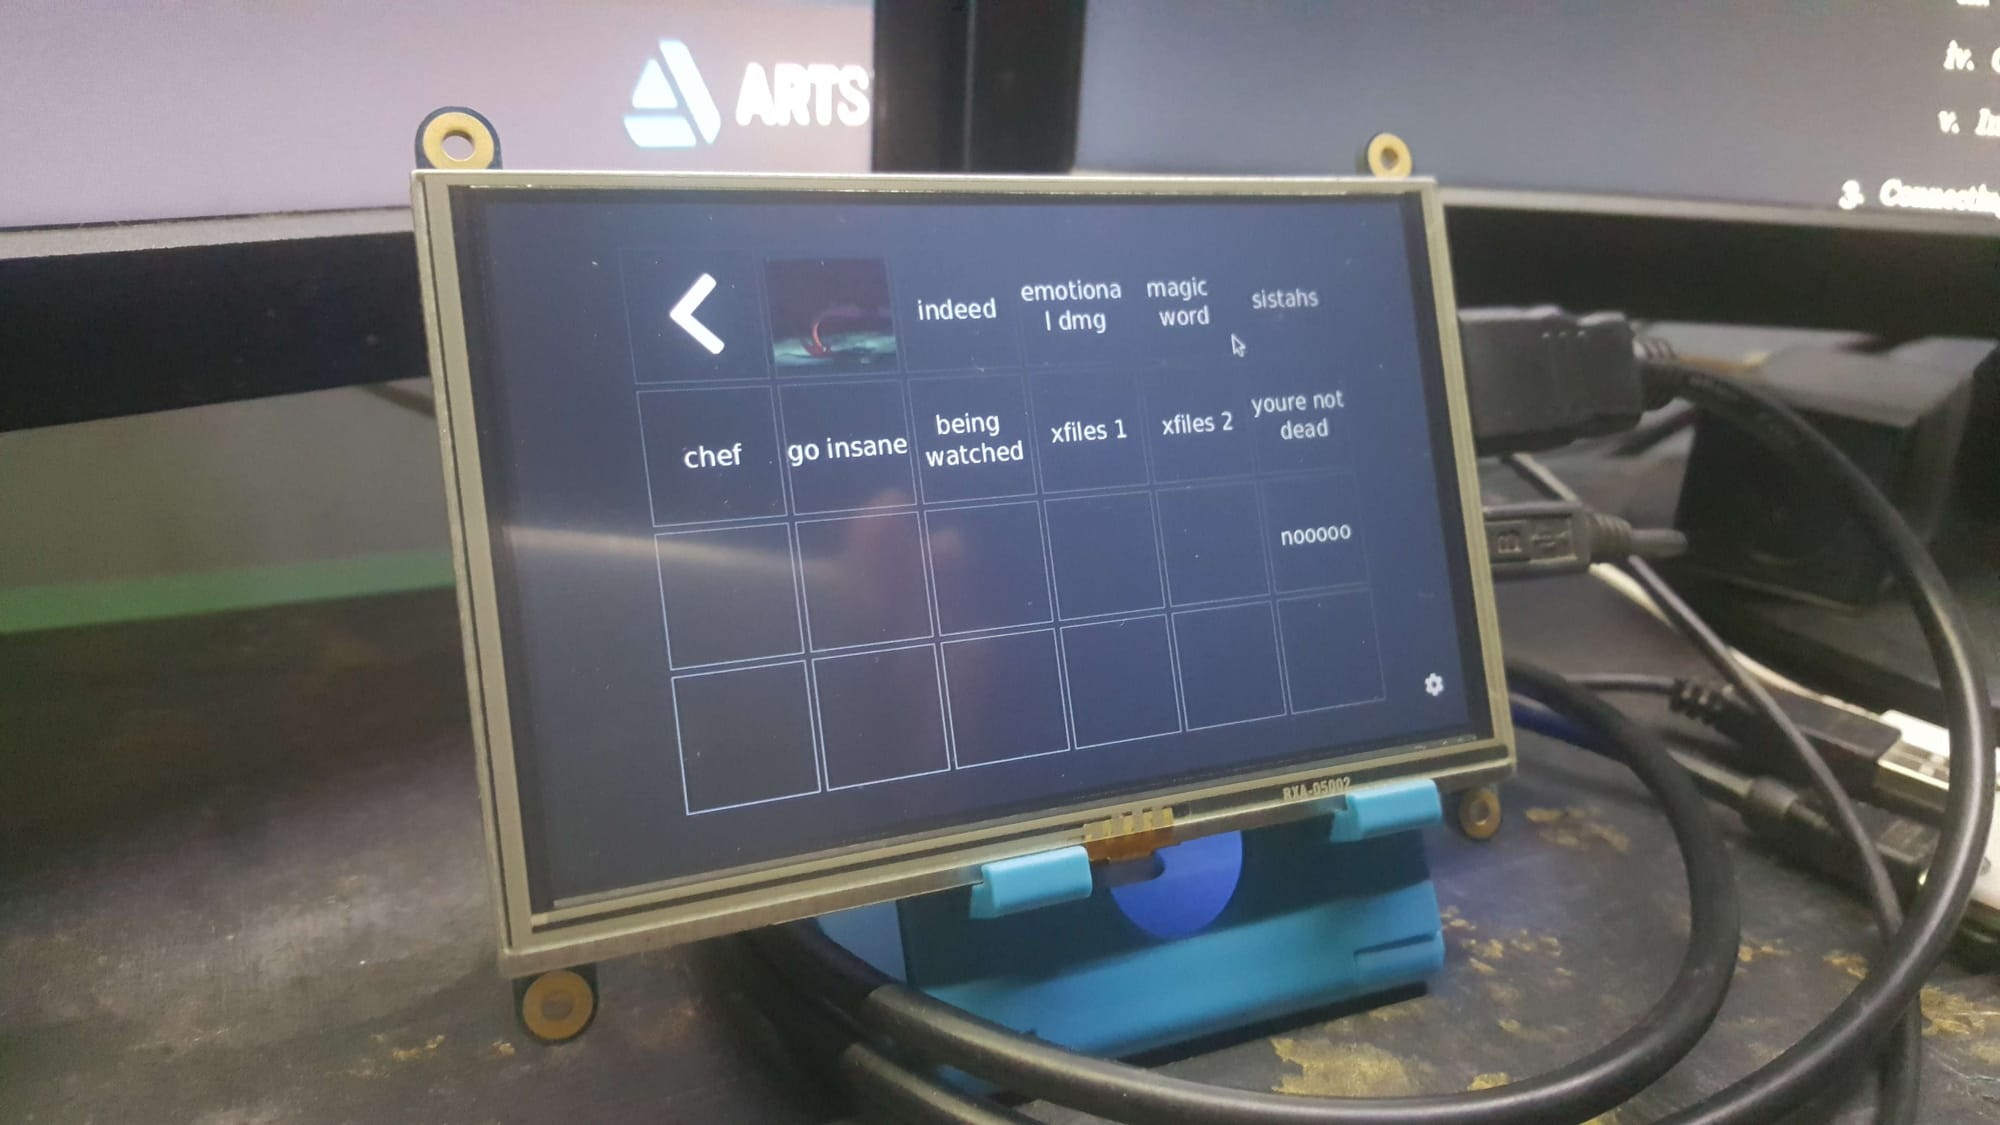
Everything is pretty self-explanatory, but feel free to reach out to me for questions. I'm still not finished with my set-up because there are new things I want to try with this installation. But the fact that you can have this with unlimited "nested tabs", unlike some other options (the free version of Touch Portal for example), is just short of amazing. The development is always ongoing and there are suggestions always being made on their GitHub and in their Discord.
If you liked this post and want more like it, be sure to hit that Subscribe button. Be sure to join our Discord as well!
